Snowflake
The Snowflake integration synchronizes metadata from your Snowflake datawarehouse into the data lineage graph.
Web App
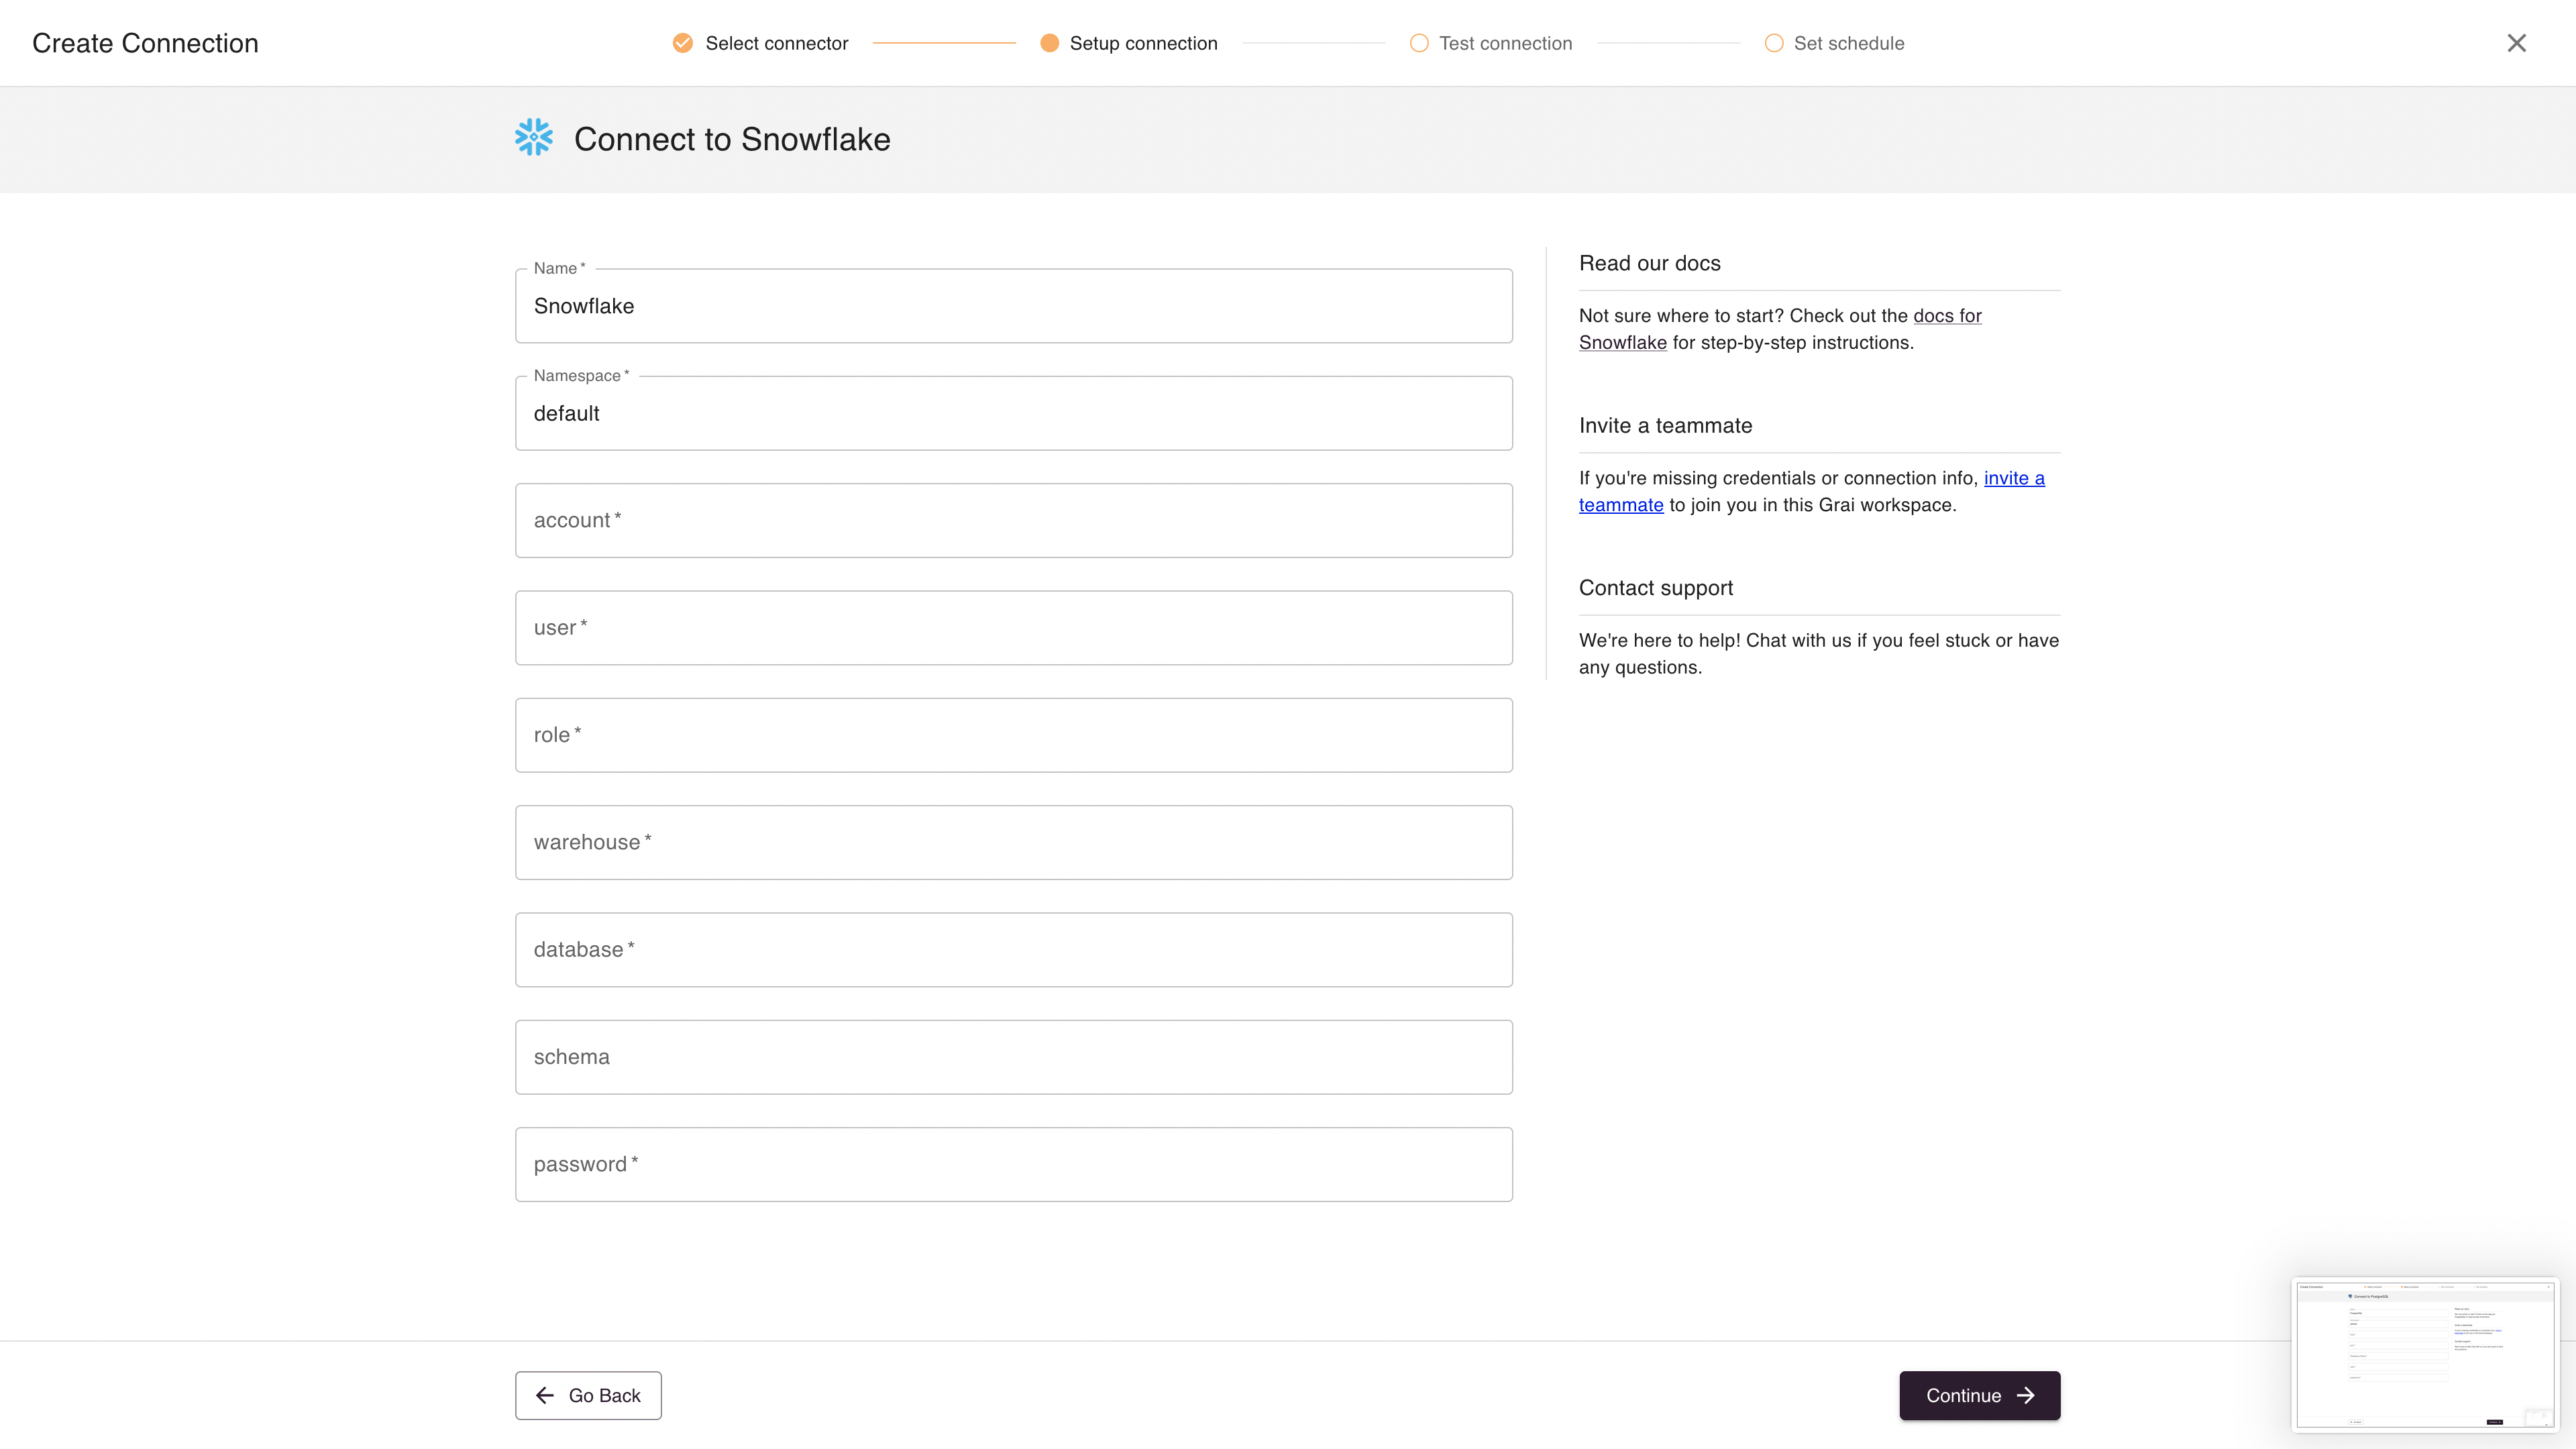
Fields
| Field | Value | Example |
|---|---|---|
| source | The name of the source, see sources | my-source |
| Name | Name for connection | Snowflake |
| Namespace | Namespace for the connection, see namespaces | default |
| account | Snowflake account, the characters in front of .snowflakecomputing.com | hujwihs-hab96881 |
| user | Database user | |
| role | Snowflake role to use | READ_ONLY |
| warehouse | Snowflake warehouse to use | COMPUTE_WH |
| database | Snowflake database | |
| schema | Snowflake schema to use (optional) | |
| password | Database password |
Python Library
The Redshift integration can be run as a standalone python library to extract data lineage from your instance of Redshift.
The library is available via pip
pip install grai_source_snowflakeMore information about the API is available here.
Example
The library is split into a few distinct functions but if you only wish to extract nodes/edges you can do so as follows:
  from grai_source_postgres import SnowflakeIntegration
  from grai_schemas.v1.source import SourceV1

  source = SourceV1(name="my-source", type="my-type")
  snowflake_params = {
    "account": "hujwihs-hab96881",
    "user": "you@your_company.com",
    "password": "so_secret",
    "role": "READ_ONLY",
    "warehouse": "COMPUTE_WH",
    "database"="GRAI"
  }

  integration = SnowflakeIntegration(source=source, namespace="snowflake", **snowflake_params)

  nodes, edges = integration.get_nodes_and_edges()